Thursday 29 January 2015

Same Three Things, Three Ways in Three Days No1(a)


As promised I am going to explain something I've decided to call (for now) Same Thing, Three days, Three ways.

It's really quite simple.  Once a month I am going to make 3 projects using 3 same items and demonstrate their versatility. For this month I am showcasing:

Simon Says Stamp/Memory Box Large Ringlets Die
Memeory Box Delightful Peony Background and Outline Die (I'm counting this 1 item)
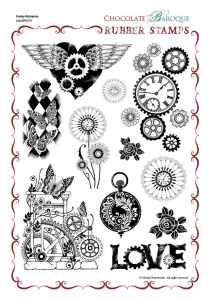
Chocolate Baroque Stamp Punky Romance


Memory Box LARGE RINGLETS Craft DIE 98790 Punky Romance Rubber stamp sheet - A4
Memory Box DELIGHTFUL PEONY OUTLINE Craft DIE 98742Memory Box DELIGHTFUL PEONY BACKGROUND Craft DIE 98744


Other Supplies
Kraft-tex
Blue Fern Studios Chipboard
Reneabouquet Butterfly
LSG Jan Challenge Colours
Sequins
Paper Artsy Stamp If I had Wings
Royal Purple Staz-on Ink
Couture Creations World Fair Collection Embossing Folder - Work Shop
Tim Holtz Tag and Bookplate Bigz Die
Clear Embossing Inkpad

Embossing PowderSpray
Pop Rock PurplePop Rock Purple
Midnight RubyJazzy jivin' Purple
Angel Wings MauveTea Pot Pruple
Terra cotta PlumCape Cod Coral
Magic Moon Pearls
Don't Eat Yellow Snow  

Tutorial

Using the Bigz die, cut a size 8 tag out of Kraftex
Using Clear Embossing inkpad stamp the Chocolate Baroque Stamp from Punky Romance and heat Emboss it with Angel Wings Mauve
This created a resist and then spray with Cape Cod Coral and Don't Eat Yellow Snow and dry using heat tool
I cut out 4 Ringlets dies from Kraftex and sprayed it in the Jazzy Jivin Purple, Cape Cod Coral, Tea Pot Purple, Pop Rock Purple and adhered the outline to the tag, then put the other coloured inside pieces and glued them down
I cut out the Peony Background die and then did another resist with the Stamp and Angel Wings Mauve
Once dry I sprayed lightly with Jazzy Jivin Purple and cut the matching Outline Die in Kraftex again and sprayed it with Don't Eat Yellow Snow (Gross yet fun name LOL!) to give it a subtle shimmer
glue them together and then fixed it to the tag
I embossed the chipboard with the Terra Cotta Plum embossing powder and stamped the If I had Wings on Kraftex and inked the edges with Dusty Concord Distress Ink and fixed it to the tag and put 3 hat pins in the foam itself
I wrapped bakers twine 3 times around the tag and out brown sequins all over the tag.  I put a Reneabouquet Signature Butterfly to the Flower Head
I used the bakers twine and ribbon on the top of the tag to finish

I'll be putting this up on the Lindy's Stamp Gang January Callenge
I'll put the next post up tomorrow.

Sunday 11 January 2015

My Goals Not My Resolutions and What I Want

Happy New Year!!!

I am well aware that it may have appeared that I have fallen off the face of the planet as I have not done any posts since October and the same goes for Facebook!  I had a few things to deal with on the home front but I am on top of most of it now and with a working camera I am now back and rearing to go!

I have had time to think about things and I am truly grateful for that.  I am focused and motivated once again.

I love all things creative, albeit making mini-albums, off the page/alterable pieces, I love card making and I love, love, love, scrapbooking.  Originally I started this journey, primarilly to do my own family memory keeping and do you know something?  I have nothing done save for a few scrapbook pages because I keep giving everything I make away or as gifts!!

I decided that I need to make some changes.  First I thought long and hard about what I want and what I needed.

I want to really get into my own memory keeping as, like me, I know that plenty of people out there have thousands of photo's that are all on the computer or on memory sticks and how many of us look back on photo's and think 'where was that taken?', 'who is that in the photo again?', 'how old is Saoirse or Alex in that picture?'.  

So my First Goal is to do 1 or 2 layouts a month on my own memory keeping and I am going to see if Project Life is a way to do that as compared to Traditional Scrapbooking.  I am going to make a journey out of it.

My Second Goal is something I'm going to call "Same Stuff, Three Different Ways over Three Days." (yes I know it's a work in progress title!!)  I am going to eplain that in my next post and I will be linking these things to monthly/weekly challenges ie. Simon Says or Lindy's Stamp Gang etc.

My Third Goal is that I am going to enter at a minimum one monthly challenge and one weekly challenge.

The Forth Goal is, I am also going to improve my presence on one social media and focus on Facebook for the time being.

My Fifth Goal is that I will also upload everything on Galleries like Pinterest and Scrapbook.com.

I really want to get my work out there and make people aware of what I can do.

I am going to start building stock to sell in fairs, markets and online so I can make money from what I love to do.  I really want to support my family financially.

Once I think I have a well organized routine and I am not pushed too hard I will come up with new goals.

Hugs to you all!

Celina

Friday 12 September 2014

Scary Edgar Allan Poe Raven Inspired Canvas September Inspiration Board entry for Scraps of Elegance/Darkness on Facebook


With Halloween just around the corner I finally decided to put this on my blog even though I have been holding it back.  However I decided to publish it now because next month will be all scary, ghouly and witchy LOL!!!

Scraps of Elegance Scraps of Darkness Scrapbook Store has an amazing owner in Melinda and this month her Inspiration Board was perfect for this so it's going to be my second entry for this month on Facebook!! 

I absolutely adore the concept of Inspiration Boards because I really don't think that I am very good at doing layouts according to Sketches but I love making pieces like this.


The Supplies I Used
I don't remember everything that I used but here is some that I do.

Canvas 8" x 8"
Tim Holtz Bigz Die Boo 31
Tim Holtz Bigz Raven and Scaredy Cat
Tim Holtz Bats Mover and Shapers
Black Gesso and Black Paint
Hot Glue and Hot Glue Gun
Heavy Mixed Medium Gel Liquitex or Golden
Tim Holtz Grungeboard
Tim Holtz Grungepaper
Tim Holtz Mirrored Sheets
8" x 8" Piece of Diamante Trim from a local Drapery
Finnabair Prima Mechanicals including Metal Caps/Metal Brads/Metal Washers/Gears/Vintage Setters/Metal Flowers/Mechanical Roses/Clock Face/Roman Numerals/Mechanical Flowers etc
Tim Holtz Idea'ology Arrows/Nature Adornments/Brads/Alpha Chips/Monocle Findings/Crossbones/Mirrored Stars/Wishbones/Enameled Tags/Buttons/Knobs etc
Prima Junkyard Findings Zippers/Nuts and Boltz/Lamp post/Street Signs/Jeans Plates etc
Wood Buttons
Wood Embellishments
Ranger Crackle Accents
Lindy Stamp Gang Magicals and Sprays in Time Travel Teal, Red Hot Poker Orange, Autumn Maple Crimson, Scramin' Banshee Black, Witch's Potion Purple, Hag's Wart Orange, Cowabunga Copper, Gag Me With A Spoon Gray,  Whale Watch Blue, Tweedle Dee Denim, Queen of Hearts Red,  Cheshire Cat Cherry, Salt Water Taffy, Hydrangea Blue, Azure Sea Asters, Sea Mint Green, Tea Pot Purple, Sweet Violet Purple Teal, Bougainvillea Fuchsia, Jazzy Jivin Purple, Danny Zuko Denim, Delphinium Turquoise, A bit o'Bubbly, Creme Brulee Cream.
Light Lutradur
Prima Flowers With Long Stems
Tim Holtz Sanding Tool
Tim Holtz Distress Paint Brushed Pewter


 If you look under the number and bats that there is a studded texture that I used as the base of my piece.  I started by painting the entire canvas in Black Paint and then placed the studded lattice cloth and glued it to the entire canvas with gel medium and then when it was dry I painted it all in black again.  When it was dry, I started adhering a Prima Vine Flower to the left and then pulled the vine around and off the canvas and that became the level of dimension that I wanted. 


 It is a little difficult to see from the angle of this photo but if you look to the upper left you can see a bat that has the tips of it's wings almost touching and what you can't tell is that the bat is glued on the raised vine. 


I worked almost exclusively after this using the hot glue gun and then when I glued all the different findings to the canvas I then used lots of hot glue to look like webbing and cobwebs and gave it a real spooky feel to it.  With thicker hot glue 'vines' I gave the impression of old overgrown and dark vines almot like it was forgotten.


 I used Grungepaper to die cut the Bats and Grungeboard to die cut the Raven painted them black and when dry apply crackle and let everything dry naturally to the Raven and I did not apply crackle accents to all of the bats

For the Boo and the No. 31 I used the Mirrored Sheets and I feel you should run it through your Big Shot (by far the best manual and versatile die-cutting machine) and remember to remove the clear plastic covering off and sanded it down to mute the shine in order to keep the overall theme of it.


Once I was happy with everything, I started applying all the different Magicals wetted with a gel medium and just built up the colour until I was happy with the overall look then I  pulled strands of lutradur apart and then built up the grey white colour of the cobwebs and that was it really.  I really enjoyed the process and I am happy with how it came out altogether.


Let me know what you think and tell me on Facebook or here what you are doing to celebrate Halloween.

Hugs

Celina


Sunday 7 September 2014

Lindy's Stamp Gang September Challenge and Scraps of Darkness Scraps of Elegance Inspiration Board


Embossing Powder - Spray
Hyacinth Blue Green - Danny Zuko's Denim
Silver Moon Mistletoe - Gag Me With A Spoon Gray
Desert Moon Cooper Teal - Fuzzy Navel Peach
Madonna Robe Blue - Ocean Breeze Blue

Cleopatra's Copper - Cowabunga Copper


Other Supplies:
Chocolate Baroque Mackintosh Beauty Stamp
Chocolate Baroque Mackintosh Sentiments Unmounted Clear Cling Stamps
Sue Wilson Dies Finishing Touches Collection - Classic Roses
Sue Wilson Cascading Hearts A4 Embossing Folder
Spellbinders Decorative Labels 28
Creative Expressions Pearly Head Pins
Viva Decor Pearl Pen - Copper
Prima Finnabair 12x12 Butterfly Stencil
Centura Pearl A4 Cardstock in White Gold, Chocolate Brown and Navy.
Copic Marker Pinkish White
Tim Holtz Distress Ink Pad Wild Honey
Tim Holtz Trellis Framework Die
Tim Holtz Mirrored Sheets

How I Did This

It's a little hard to see but on the shimmery side of the Centura Pearl Snow White Cardstock I cut it down to 71/2" x 71/2" and put the Prima Elementals Finnabair Stencil Butterfly on top and sprayed with the LSG Ocean Breeze Blue and let it sit and remvove the stencil and dried it thoroughly with my heat tool.
When completely dry I sprayed the whole thing with the Same Spray lightly and then dried it again thouroughly.  I loved how it looked and I stamped the Chocolate Baroque Mackintosh Sentiments Stamp 'Happy Birthday' on the lower Left Side and then embossed it with the Sue Wilson Cascading Hearts Embossing folder and then put it to the side.

On another Centura Snow White Cardstock and I Stamped the Chocolate Baroque Mackintosh Beauty on the reverse of the cardstock which is fantastic for colouring and painting and inking!  I embossed the image with the fabulous Silver Moon Mistletoe and when cool I started the fun fun stuff!!


I have all the sprays and powders but not the magicals and I really wanted to color in the image so I gave it a little go.  I colored the skin areas with Copic Marker 'Pinkish White'

I opened all the bottles and dipped my fine paintbrush into the bottle itself.

I used the Gag Me With A Spoon Grey for her hair.  I painted all the flowers with the Ocean Breeze Blue.  I did the ribbon in Fuzzy Naval Peach.  I did the dress in the Cowabunga Copper and Fuzzy Naval Peach to accent here and there and the Danny Zuko Denim for the sleeve.

I let it dry naturally before I cut it out with the largest die from the Spellbinders Decorative Labels 28 and then used the TimHoltz Wild Honey Distress Ink Pad around the edge.
 To do the flowers and leaves I cut the White Centura Pearl Card into 3 strips and sprayed 1 with the Gag Me With A Spoon Gray, and Fuzzy Naval Peach dried them well and cut out 2 flower outline 2 of the detailed flower and 2 large/extra large and 2 small leaves and applied as seen the peach with the gray detailed flower pinched the petals for dimension and then put the bottom part in reverse and glued them in place.  I put the leaves where I wanted and then put it all to the left of the stamped image.


For the band that goes across and under the die cut spellbinders piece I cut out 3 Frameworks Trellis from Tim Holtz. 2 in plain cardstock and one in the Tim Holtz Mirror sheet.  Sometimes it's neccessary to put the mirror sheet through your Big Shot (just remember to change the piece you want cut around a little so it will cut more) because the sheets are quite thick.  On the 2 I cut from cardstock I inked them up with clear embossing and poured the Hyacinth Blue Jade Embossing Powder over it and heat embossed (I did this twice to ensue a thick and complete impression)

Then with the little pieces I applied glue and covered some with Gag Me With A Spoon Gray Glitter and others with the Cowabunga CopperGlitter  (which are both from the Totally 80's set) and 1 with the magicals powder itself of the Cowabunga Copper (it was an accident but I loved the look of that piece). I also used a some of the mirror sheet pieces.

Once I was happy with where I wanted to place the focal point raised up slightly with double sided foam adhesive pads on the embossed cardstock I glued the Trellis piece and then put everything together.  I layered it all and rounded the corners with the We R Memory Keepers Corner Chomper Deco/Stub and I used the Viva Decor Pearl Pen to create dots all around the edge (it was the 1st time I did this and they are by no means perfect I'm afraid!).


To Finish I layered the piece to Brown and then Navy Centura Pearl cardstock.

Let me know what you think of this.

Hugs for everyone!


Monday 11 August 2014

Scraps of Elegance July Inspiration Board Challenge


For July Melinda decided that an inspiration board would be the challenge for this month rather than the usual sketch for Scraps of Elegance


You can find the kit listed here and a description of all the products used.


Other Supplies Used

Elizabeth Craft Designs Silk Glitter
PaperArtsy Grunge Paste
Golden Extra Heavy Gel Medium (matte)
Tim Holtz Dies Ornate Frames, Courtyard, Lattice
Tim Holtz Distress Ink Walnut Stain
Tim Holtz Stars
Inkssentials Crackle Accents
Inkssentials Glossy Accents
Cosmic Shimmer Hologram glitter
PaperArtsy 9" x 11" stencil
Prima Butterfly Stencil
Prima Resin Frames
Fabscraps Die cut shape (Forever and Always)
Lindy Stamp Gang Hydrangea Blue Mauve embossing powder

I used the IB panel 3 had different frames and I cut out 2 from the Sizzix Ornate frames and applied glossy accents.  I accented those with a Prima rsin heart frame and embossed it with LSG desert moon turquoise


The first IB panel is focussed on the phrase so I used this one from Fabscraps and embosses LSG embossing powder in 2 layers to build it up and give it a great shine
The butterfly on IB panel 4 is shown in a few ways. I used the Prima Butterfly stencil with Golden extra heavy paste and put fuchsia silks glitter on most of them and Cosmic Shimmer Iced Snow on the rest.  I used the same colour on the board and put it in the glitter on the grunge paste on the circles.  I used the dark gray from the IB as my scrapbook page.  I used the reneabouquet butterfly as an accent.
On the last IB panel the little girl is wearing a crown of pink flowers which I put on the bottom right.  I also thought it looks aged so I used the clock charm to accent it.  I used the Prima Chalk pink through a paperartsy stencil.  I used the courtyard die to cut out all circles (like a crown)
I really hope Melinda keeps the IB panel because it works so much better than a sketch and most of us show much more than a sketch piece on the forum/community.

Tell me what you think

Hugs


Monday 28 July 2014

Tim Holtz 12 Tags of 2014 July


 Excerpt from Edgar Allan Poe poem

The Raven

(Once upon a midnight dreary, while I pondered weak and weary,
Over many a quaint and curious volume of forgotten lore,
While I nodded, nearly napping, suddenly there came a tapping,
As of some one gently rapping, rapping at my chamber door.
`'Tis some visitor,' I muttered, `tapping at my chamber door -
Only this, and nothing more.' .....

.....
But the raven still beguiling all my sad soul into smiling,
Straight I wheeled a cushioned seat in front of bird and bust and door;
Then, upon the velvet sinking, I betook myself to linking
Fancy unto fancy, thinking what this ominous bird of yore -
What this grim, ungainly, ghastly, gaunt, and ominous bird of yore
Meant in croaking `Nevermore.')

This is Tim Holtz Tag for July if you just follow the link


This was a tough technique for me today because I thought my lovely Big Shot Pro machine was going to break trying to emboss construction acetate (I didn't have Shrink film to hand)!!! Honestly I don't know why it didn't break!!

I have been trying to do his tag techniques in a way that makes my own appear pretty.  That's why I loved his June Tag so much.  But, I didn't do all the steps since I only wanted to do what would make something appealing. 

That is my comfort zone.  And I need to be pushed out of it.  Pretty is what I love, however, I think that's making me far too rigid in my arty expressions so I'm going to push my boundaries creatively and enjoy learning and executing new instructions.

So this time I was much more careful to follow each of the steps.


I am subscribed to Melinda Kelly's Scraps of Elegance and Scraps of Darkness scrapbooking kits, and her SOE kit for July is all about Marion Smith Designs, Mad Tea Party.  That is when I thought about the Mad Hatter's question from Alice in Wonderland "Why is a raven like a writing desk? That thought led me to the raven from Edgar Allen Poe and the word "Nevermore" and I knew what I wanted my tag to have.


That one word "Nevermore" scared the holy moley outta  me when I was really young and I'd come across poem.  I am aware now that it is about loss and the depression felt by those left behind and I believe for different reason why this poem is still able to scare me.


Supplies
TH Writing Desk Bigz Die
TH Raven And Scaredy Cat Bigz Die
TH Cobweb Decorative Strip
TH Movers and Shapers Die - Mini Bat and Skull Set
Graphic 45 Nevermore (Steampunk Spells)
TH Distress Paint Seedless Preserves, Black Soot, Tea Dye, Walnut Stain, Faded Jeans, Old paper, Dusty Concord,
TH Distress Stain Faded Jeans, Seedless Preserves,
TH Distress Ink-pads, Tea Dye, Walnut Stain, Black Soot, Picket Fence, Old Paper
TH Distress Pen Seedless Preserves, Black Soot, Faded Jeans
TH Spritzer
TH Grungeboard
TH Cracked Embossing Folder
TH Word Band
Clear UTEE
Adirondack Red embossing powder
Glossy Accents
Distress Glitter Rusty Hinge, Seedless Preserves
Construction Acetate
Size 12 Manilla Tag
Eerie Graphic 45 Cardstock
Black Ribbon
Crackle Accents
TH Staples/stapler
Golden Gold imit paint
Black Cardstock


Well I hope you like it and tell me what you think.

Hugs

Celina

Friday 27 June 2014

Kathy Orta Organizer with SOE Bo Bunny Papers!

I started out with the idea of making this Organizer following Kathy's tutorial videos and she made it so fast (seemingly) but OMG was it a real trial for me LOL!! 


 Back                           Side


It's a gift for Saoirse's teacher because she and the school have been amazing since Saoirse has been dealing with her serious eye problem.  Ms Hackett and the entire staff of the Our Lady's of Mercy Primary School here in Waterford City Ireland have been fantastic and really are the ideal for what teachers and school should be.  We are planning to move to the UK in the next few months and I'm going and I wanted to show them how much I appreciate everything they did for her.


Thank you all.


You can find a video here about what I did and to show how it looks


This is my very first Youtube Video!!

http://youtu.be/ObSNe3OO2GE
It's amazing how well she is handling everything and it just goes to show how resilient children are no matter how difficult things are for them.  I am so so proud to be her mother! :) <3 even when she is being a brat or won't go to bed LOL!!


Anyway as she had lost over 50% vision in her left eye so suddenly the school bent over backwards for her and us.  Ms Hackett and her Principal Mrs Brick did everything that they could to make sure Saoirse didn't fall behind because of being off sick for so long.  Their support really blew us both away.  I must admit when we went to the school initially, to inform them about what was happening last September that I will say I cried a little because they made us really feel we weren't alone during this difficult time.  Because Ms Hackett worked with us Saoirse didn't get lost in her work or feel too different from her friends. This was so important for a 7 year old.

I wanted to do something special for Ms Hackett and because we can't buy anything, I made this instead, and, it took much, much, longer than I thought.  I just wanted to get it right!  School finishes tomorrow


I'm not going to say how I did it (it's against the rules) you have to get it from Kathy's site or Youtube.


Supplies

Bo Bunny Primrose Collection (Scraps of Elegance April)
Bo Bunny Primrose Ephemera
Creative Expressions Self Adhesive Black Pearl Swirl
Fab Scraps Oriental Catch Embellishment (Scrapadapadoo)
Prima Resin Butterfly
Paper Accents Brown, Beige, Green, Deep Pink Cardstock 12 x 12 (Scrapadapadoo)
Prima Free Spirit Paperclips
Prima Cartographer Paperclips
Prima Free Spirit Silver Clips
Prima Free Spirit Brads
Prima Seashore Brads
Tim Holtz Distress Ink Pads Picked Raspberry, Mowed Meadow, Victorian Velvet, Aged Mahogany.
Miracle Tape 3/8"
Scor-Tape 1/4" and 6" and 1/2"
Scotch Quick Dry Glue
Scotch ATG Gun
Beacon Quick Dry Superglue
12 x 12 Chipboard
Buttercream 1mm Kumihimo Cord
We R Memory Keepers Corner Punch (Green) Deco/Stub

I really hope you like and comment on this post.

((Hugs))

Celina