Monday, 17 February 2014

What do you get when you mix a PaperArtsy Triple Icon, Dylusions Stencil, Sheena Douglass' Honesty Stamp Set, Fresco Finish Paint and Me?


I came across one of Leandra's PaperArtsy videos and loved how she used the fresco paints and the Triple Wood Icon's she sells on her online store.

I think the stamps and items she sells are absolutely fantastic and versatile.  I bought the Fresco Chalk-effect Paints and can't get over the incredible opacity of the paler colors and them the translucency of the darker tones.

But the piece de resistance is the crackle laze gel.  OMG!! I have never seen crackle (and I have quite a few) work anywhere near as well and so quickly.  Traditionally you have to apply a thick layer 2mm approx and then wait for it to dry over a few hours.

Not the Fresco Finish Crackle Glaze!!  Paint a dark colour and dry it then apply a very thin layer of the crackle gel and then scrape a good bit off.  It can be heat dried and when it is completely dry apply a thick coat of paint in a contrasting and lighter colour ove the crackle.  You have to work very quickly and in one direction as the cracks happen immediately.  Stunning effect and I don't think I'll see anything to beat it for a long time to come.


Supplies
PaperArtsy Wood Triple Icon
Grunge Paste from PaperArtsy
Fresco Finish Paint
Fresco Finish Crackle Glaze
Sheena Douglass Honesty Stamp (a little bit magical collection)
Dylusion Stencil 9x12
Silks Paint
Flower Soft
Viva Decor Stamp Paint and Ferro Paste
Sizzix Vintaj DecoEmbos
Vintaj Blank
Crafters Workshop Bricks Stencil
Lindy Stamp Gang Magicals
Luminarte Primary Elements Wintermist Grey


1.   Apply Ferro paste through the leaves vine on the sides and top of the icon

2.   Once dry paint Magenta and dry then apply a very, very thin film of crackle glaze and dry
3.   When dry apply mermaid over the entire centre panel of the icon in one direction


4.   Start blending colours so purple, pink, blue and when it is blended to your satisfaction allow it to dry.


5.   Stamp the lady from the Honesty from Sheena Douglass' Lil Bit of Magic Collection onto the wood panel itself
6.   Fill in the the lady with Viva Decor Stamp paint in greens and gold and brown for the hair silver for her diadem.
7.   Stamp the same image on to a thick 300gsm+ white card and paint her with Silks purple shades, brown hair and apply flower soft flock so she appears to wear a circlet of roses and baby's breath
8.   Adhere the 2nd lady slightly behind the first on foam to give it depth


10. Apply Grunge Paste through the brick stencil and paint with Primary Elements Wintermist Grey o the lower right and upper left
11. Apply two little acetate foiled butterflies from Hunkydory to the right on the bricks on the right and on the vines on the left


12. Using a 1" Vintaj Circle blank and run it through the Big Shot machine using the 'Moonlight' DecoEmboss to abstractly emboss the moon and wispy clouds and then paint it green, and amethyst with the Vintaj paint
13. Adhere it the the upper right

That's it really, and I think it came out nicely snd I really enjoyed making it which is really the primary and most important reason for doing things like these.
I haven't made up my mind what to do for the outside but be assured that it will be another post for another day.

That's all

((Hugs))

Celina


Thursday, 6 February 2014

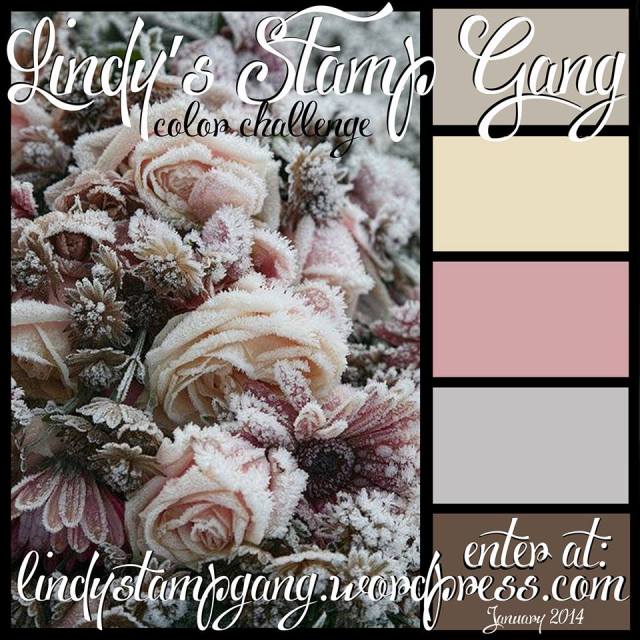
Lindy's Stamp Gang February Color Challenge


1888689_10203190679996746_1901479501_n

Embossing Powder - Starburst Spray

Starbright Gold Green - Opal Sea Oats

Midnight Teal - Tibetan Poppy Teal

Razzleberry Plum - Cheshire Cat Cherry

Silver Moon Turquoise - Silent Night Silver
I think I seem to have craft dies from most company's and so many that I haven't even begun to use a fraction of them in my cards, alterables or scrapbook pages.  I started out collecting Spellbinders ones first, then Memory box, Simon Says Stamps and Sizzix.  I freely admit I have gone way overboard on more than one occasion.

So I decided to really challenge myself and try to make a nice card without using my dies and use chipboard pieces so I didn't cheat ... well ... me!!

At the moment the whole less is more trend is something I'm struggling with.  It's difficult to keep the bulk of a card white or neutral so I did this card as a study of sorts to find out how difficult it is to do a minimalistic looking and make it aesthetically pleasing too.  I like how it turned out considering how it was made up of a 3inch strip of lots of dots pretty much.

My passionate love affair with the fabulous LSG starburst sprays is ongoing, because they are two-toned (three tones really) sprays.  Not only do they have the main colour i.e. Cherry but also a mica that is golden and an extra more subtle shimmer too.

Their embossing powders have fantastic coverage and are two toned.  I love them and they are my go to embossing powder.  There isn't a colour I don't love.

Supplies

Centura Pearl Card (non-pearl side)
Lindy's Stamp Gang Starburst Spray Tibetan Poppy Teal
Lindy's Stamp Gang Starburst Spray  Cheshire Cat Cherry
Lindy's Stamp Gang Starburst Spray Silent Night Silver
Lindy's Stamp Gang Starburst Spray Don't Eat Yellow Snow

Lindy Stamp Gang Embossing Powder Angel Wings Mauve
Lindy Stamp Gang Embossing Powder Razzleberry Plum
Lindy Stamp Gang Embossing Powder Silver Moon Turquoise

Lindy Stamp Gang Glitter Gag Me With A Grey Spoon
Lindy Stamp Gang Glitter Pretty in Pink

Cosmic Shimmer Black Detail Powder
Just Rite Everyday Vintage Stamp

Versamark Frost Ink Pad
ArtGlitter Dries Clear Glue
Brilliance Pearlescent Yellow Ink Pad
Wycinaka Chipboard Hummingbird Swirls

1. Cut and trim centura pearl card to 20cmx20cm and leave to the side
2. Cut 3inch width x 20cm length and using the starburst sprays unscrew the cap and flick drops onto the 3" strip of card on the reverse side of the card and dry
3. Repeat with the Cheshire Cat Cherry and dry and then the Silent Night Silver
4. With the Don't Eat Golden Snow Spray spritz the whole piece with the spray and then dry
Hello Friend Says It All, Dont You Think?
5. With the chipboard pieces Ink it with the Versamark and pour on the embossing powder (larger piece is Razzleberry Plum and the smaller piece with the Silver Moon Turquoise) It took 2 layers to get the right amount of powder on them.
6. While the pieces cool I took the little chipboard flowers and put a layer of glue on each of them and then applied half of them in Gag me With a Grey Spoon Glitter and the rest with Pretty in Pink Glitter
7. Ink up Hello Friend phrase and stamp directly to the lower right of the 20x20cm piece of card
8. Edge the 3inch strip with brilliance pearlescent inkpad and adhere it onto the middle of the 20x20inch card
9. Glue the large Razzleberry embossed Chipboard to the middle of the coloured strip and place the little glittered flowers
10. The smaller swirl is glued under the phrase and the remaining glittered flowers affixed to the rest of the card.
11. Layer the card onto holographic mirror card to finish


Try making a card like this and don't be afraid of empty spaces.

((Hugs))

Celina


Wednesday, 5 February 2014

All Hail Moldable Film and Fibre

 Angelina Fusible film and fibre and Fantasy Molding Film and Fibre is something that I have had in my arty crafty arsenal for a long long time and I bought it a couple of years ago initially and had great fun with it for a while and then when I had used it all up, I kept meaning to buy more and when life got in the way as it does, I kept forgetting until I forgot all about it completely LOL!!


Blue Fire Fantasy Film with Lindy's Stamp Gang Venus Violet Blue Embossing powder 
Tim Holtz Stampers Anonymous Cling Stamp


Then a stange thing happened.

I was clicking my way around youtube as I often do (I have the attention span of a fruitfly when I'm bored) and I clicked on a video that I had seen before and it was about one of the ways you can use Angelina/Fantasy Film or Fibre.  She made really cool pendants using embossing powder, UTEE, glass and fantasy film.


You can stamp it, sew it, even wash it.  It only bonds to itself and fibre and you can keep the excess and bond it to more of itself and there is no waste at all.
abc
a. b. and c. are all done with the same film and embossing powder and PaperArtsy Hot Picks Mini Stamp but they all look different because of the ink pad or stamp paint
(a) is with Brilliance Silver Pigment ink (b) is actually Viva Decor Stamp Paint (Post on this fun line to follow and (c) is with Brilliance Platinum ink pad

So these are a few of the ones that I have made using different colours and Stamps and Different inks I used.
Up Close

 2x2 inch glass PaperArtsy Hot Pick stamps

I found my old stash of film and even fibre (after ripping my art room apart looking for it) and played, and played and played!!!!  It was so much fun and I really enjoyed the process and wanted to make many more eclectic pieces until well ... I used it all up :( .  So what I did then, is what I normally do.  I went online and bought some Angelina film and fibre from Claritystamps.co.uk and found out where I could get the same kind of Fantasy film and found it with the ArtGlitter.com and they had so many more colours and I bought 1 of every colour and it even comes in 20 inch wide in the Aurora for wearable art.  So cool!!!  It was super fast on the delivery as well from both web sites.


This is 1.5x1.5 glass and frame and I used I think a Hero Arts cling stamp and clear embossing ink pad. I love the subtle effect the clear ink gives this piece


Supplies
1. Fantasy Film
2. Clear UTEE
3. Embossing Powder (dark colours are best)
4. Ranger Memory Glass (2x2 1x3 1.5x1.5)
5. Memory Frames (not essential)
6. Versamark or any clear embossing ink pad
7. Stamp that is bold and not too detailed

Now to make;

1. press glass slide into ink pad and make sure it is completely coated and pour dark embossing powder and return excess to jar and melt with heat tool repeat this at least 3 times.
2. cut a piece of film approx 2x the size of the glass and scrunch it up as much is possible and leave to one side
3. once the powder is dry on the glass and cool to the touch press the embossed side of the glass into the inkpad and un-scrunch the film and press into the embossing powder
4. heat with the heat tool and it will shrivel the film but don't be afraid and let it cool down again
5. once the film is cool to the touch press the ink pad into the film and pour UTEE onto it and pour the excess into the jar and repeat step 1 two more times.
6. ink up the stamp with any sort of permanent archival ink that you want to use.  I used Brilliance Silver that takes a good while to dry because the Staz-on just wouldn't do what it was told to do and press very firmly into the UTEE whilst it is still hot.
7. once it has cooled down angle your scissors slightly and cut off the excess around the glass and slide into a memory frame.  

It's so fun and I gave them to a few of my aunts and they seemed to like them.

I'm putting the film on everything and anything and it looks fantastic!  Really does live up to its name.

That's all for today.  Let me know if you like what I made using just one truly fun technique.

I hope you are all well where you are and take care of yourselves.

((Hugs))
1x3 This has a little fibre under the film and gives more depth

They make great key chains & its portable art
I love that the stamps look a little celestial

 
Celin

Tuesday, 14 January 2014

Lindy's Stamp Gang January Colour Challenge

This is my entry for the January colour challenge.  
I thought it looked drab and for a few days I was not going to do an entry.  That is until I remembered the Once Upon a Time series specifically the Season 2 premiere where Aurora wakes up from her sleep.  I knew that my niece would love this theme and so I became inspired.  She is fifteen since the 9th and although I had given her money I decided to make her something as well.

I bought a wood hanger from CardznScrapz. Then I ran away with it!!

Viva Decor Graphite Ferro Paste  (a fantastic gritty structure) that dries quickly and can be painted and sanded and easy to use.

I painted it with white paint and dried it with a heat tool.
Then I got to work and as my three year old says "Oh! What Fun!!".
The fabulous products I used from Lindy's Stamp Gang are
Bodacious Blush spray and magicals
Gag Me with a Spoon Gray spray and magicals
Cleopatra's Copper embossing powder
Silver Moon Mistletoe embossing powder
Queen Sheba Silver embossing powder
Gag Me With a Spoon Gray and Bodacious Blush Glitter
Fusible Webbing which is really fun to play with.
Lindy's Stamp Gang Side Swirl Accents Large and Small (I love these as they are simple and aesthetically pleasing on any project.)
Prima Flowers and Resin Fairy
Versa Mark Frost Embossing Pad
Prima Brads
Prima Junkyard 

Memory Box Alphabet Dies Uppercase and Lowercase  

Golden Acrylic Paints for a base.

I painted the entire hanger white once the Ferro had dried. 

I painted it alternating between Burnt Sienna and Alizarian Crimson Hue and Gray made up of Carbon Black and Titanium White.
I painted up a lot of layers of Magical Gag Me with a Gray Spoon and Bodacious Blush which I had barely dipped with water. 

I layered the colours so many times that the colours became opaque.  Then to blend the edges I sprayed more of the colours all over. When it dried I put the webbing in a few areas and used the heat gun to make it look lacy (slightly) and put a little Cleopatra's Copper and Queen Sheba Silver and heat embossed it.
I put the glitter on the LSG accents and let them dry.


I sprayed and painted the Prima Flowers with the LSG sprays.
I layered them with the Junkyard Findings and brads and dried everything.


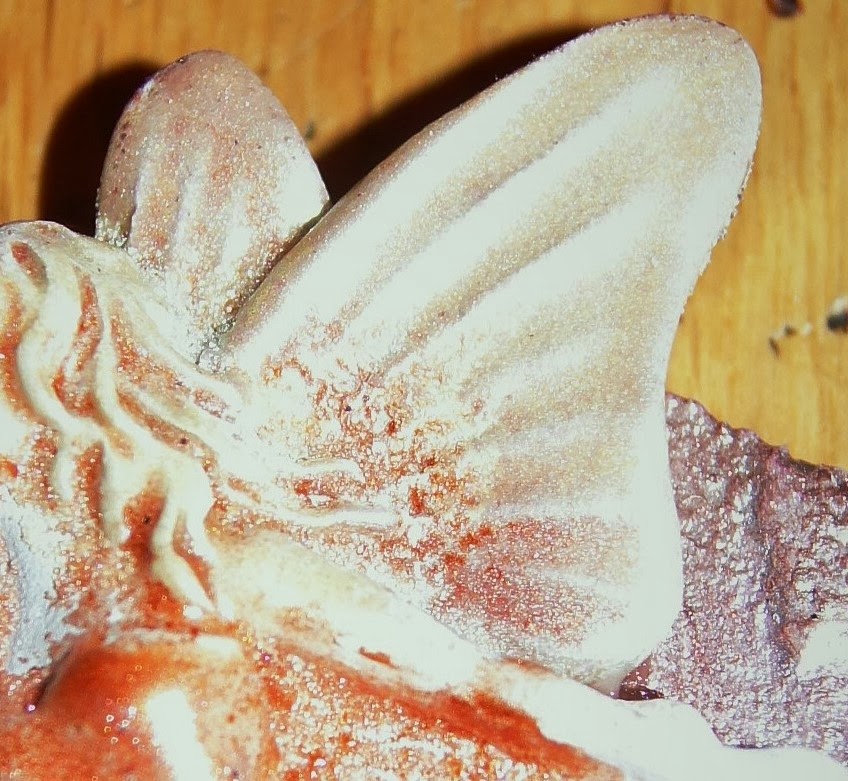
With the fairy I applied the Versamark pen and used the Cleopatra Copper for the dress. I embossed the wings with a tiny amount of the Cleopatra Copper and Silver Mistletoe.
I die cut the uppercase and lowercase letters and embossed with Silver Mistletoe and adhered everything to the hanger.
I think my Niece will like it.
I hope you tell me what you think, I would love some feedback.
That's all for now
((Hugs))
Celina

Tuesday, 24 December 2013

Lindy's Stamp Gang Drcember Color Challenge

Hi All,

It's getting very close to Christmas Day and I can't wait!!  We are spending it with my family in Cork this year.  My children are still little so I am looking forward to christmas morning and seeing the wonder in their eyes.  I think this is the most splendid day of the year.

998076_10151641662013863_2057963122_n

I was recently in Athlone with my two little monsters and husband to participate in a Christmas Jamboree party hosted by the fantastic Create With Kate (Walsh) at the Hodson Bay Hotel.  I had a lovely time but I wasn't able to really get stuck into the classes because my children kept coming in and wanting me to go with them for one reason or another.  (I'll be going on my own next time :) !!!)

One of the classes I tried to do was Martina Downes Tim Holtz Christmas Wreath Class.  I was in and out of the room so much I ended up takeing lots of photos and buying the supplies I needed afterwards from Create With Kate, Cardz'n'Scrapz, Scrapbook.com and especially Lindy's Stamp Gang for their incredible sprays. 

The LSG December color challenge is as shown above and I made this wreath based on the color scheme shown for a great friend Vicky.


I loved this color palette as all the colours are my favorites!!!


Supplies:-

Wooden Wreath from Penney's
Lindy's Stamp Gang Time Travel Teal Spray
Lindy's Stamp Gang Sweet Violet Purple Teal
Hunkydory Fairy Kisses Glitter
Ranger Grungeboard
Ranger Grungepaper

Sizzix - Tim Holtz - Alterations Collection - Bigz Die - Christmas - Holly Branch

Sizzix - Tim Holtz - Texture Fades - Alterations Collection - Christmas - Embossing Folders - Textured Poinsettia Pattern Set

Hot Glue Gun (essential)
Small set of battery operated fairy lights
Waxed thread to lace up skates
Flower Soft Snow (gives the blades of the skates the impression that the have ice shavings on them)
Kanban Snowflake Stickers
Viva Decor Silver Metallic Rub (to highlight embossed flowers and some areas of the wreath)
Rich Magenta and Teal Blue Cord
White Bias Ribbon
Anita's Jingle Bells from Docrafts


Thursday, 31 October 2013

Mother Daughter's Sister's Prima BAP October 2013

This is my October Prima BAP Sketch Challenge.

I really loved the look of the sketch so I did it as closely as I could.  I'm happy with how it came out but it isn't totally me.  I'll work on it some when I'm hit with a moment of inspiration in the future.

Supplies
Prima Flowers, chalkboard, pink edger, prima labels (Firefly, Lyric,) Sunrise Sunset Cardstock, Delight Cardstock, Stencils Finnabair Elementals Bubbles 12 x 12, Butterfly 12 x12, Vintage Vanity Doily 6 x 6,
22guage wire, seed beads from my stash
Lindy's Stamp Gang starburst colours
My Craft Studio fine white glitter
Cosmic Shimmer Gilding Wax Silver and Plum and Gold
Molding Paste from CardznScrapz Shop
Luminarte Primary Elements from CardznScrapz Store

I spilled some red ink onto my wedding dress in the photo so I covered it in lots of glitter and I love how that mistake brought about the most favourite part of the layout for me.

The 2 labels behind the photo actually pull out and I wrote a few private things about how I felt that day.


That's All for Now
Hugs
Celina