Showing posts with label tim holtz. Show all posts

Friday, 12 September 2014

Scary Edgar Allan Poe Raven Inspired Canvas September Inspiration Board entry for Scraps of Elegance/Darkness on Facebook


With Halloween just around the corner I finally decided to put this on my blog even though I have been holding it back.  However I decided to publish it now because next month will be all scary, ghouly and witchy LOL!!!

Scraps of Elegance Scraps of Darkness Scrapbook Store has an amazing owner in Melinda and this month her Inspiration Board was perfect for this so it's going to be my second entry for this month on Facebook!! 

I absolutely adore the concept of Inspiration Boards because I really don't think that I am very good at doing layouts according to Sketches but I love making pieces like this.


The Supplies I Used
I don't remember everything that I used but here is some that I do.

Canvas 8" x 8"
Tim Holtz Bigz Die Boo 31
Tim Holtz Bigz Raven and Scaredy Cat
Tim Holtz Bats Mover and Shapers
Black Gesso and Black Paint
Hot Glue and Hot Glue Gun
Heavy Mixed Medium Gel Liquitex or Golden
Tim Holtz Grungeboard
Tim Holtz Grungepaper
Tim Holtz Mirrored Sheets
8" x 8" Piece of Diamante Trim from a local Drapery
Finnabair Prima Mechanicals including Metal Caps/Metal Brads/Metal Washers/Gears/Vintage Setters/Metal Flowers/Mechanical Roses/Clock Face/Roman Numerals/Mechanical Flowers etc
Tim Holtz Idea'ology Arrows/Nature Adornments/Brads/Alpha Chips/Monocle Findings/Crossbones/Mirrored Stars/Wishbones/Enameled Tags/Buttons/Knobs etc
Prima Junkyard Findings Zippers/Nuts and Boltz/Lamp post/Street Signs/Jeans Plates etc
Wood Buttons
Wood Embellishments
Ranger Crackle Accents
Lindy Stamp Gang Magicals and Sprays in Time Travel Teal, Red Hot Poker Orange, Autumn Maple Crimson, Scramin' Banshee Black, Witch's Potion Purple, Hag's Wart Orange, Cowabunga Copper, Gag Me With A Spoon Gray,  Whale Watch Blue, Tweedle Dee Denim, Queen of Hearts Red,  Cheshire Cat Cherry, Salt Water Taffy, Hydrangea Blue, Azure Sea Asters, Sea Mint Green, Tea Pot Purple, Sweet Violet Purple Teal, Bougainvillea Fuchsia, Jazzy Jivin Purple, Danny Zuko Denim, Delphinium Turquoise, A bit o'Bubbly, Creme Brulee Cream.
Light Lutradur
Prima Flowers With Long Stems
Tim Holtz Sanding Tool
Tim Holtz Distress Paint Brushed Pewter


 If you look under the number and bats that there is a studded texture that I used as the base of my piece.  I started by painting the entire canvas in Black Paint and then placed the studded lattice cloth and glued it to the entire canvas with gel medium and then when it was dry I painted it all in black again.  When it was dry, I started adhering a Prima Vine Flower to the left and then pulled the vine around and off the canvas and that became the level of dimension that I wanted. 


 It is a little difficult to see from the angle of this photo but if you look to the upper left you can see a bat that has the tips of it's wings almost touching and what you can't tell is that the bat is glued on the raised vine. 


I worked almost exclusively after this using the hot glue gun and then when I glued all the different findings to the canvas I then used lots of hot glue to look like webbing and cobwebs and gave it a real spooky feel to it.  With thicker hot glue 'vines' I gave the impression of old overgrown and dark vines almot like it was forgotten.


 I used Grungepaper to die cut the Bats and Grungeboard to die cut the Raven painted them black and when dry apply crackle and let everything dry naturally to the Raven and I did not apply crackle accents to all of the bats

For the Boo and the No. 31 I used the Mirrored Sheets and I feel you should run it through your Big Shot (by far the best manual and versatile die-cutting machine) and remember to remove the clear plastic covering off and sanded it down to mute the shine in order to keep the overall theme of it.


Once I was happy with everything, I started applying all the different Magicals wetted with a gel medium and just built up the colour until I was happy with the overall look then I  pulled strands of lutradur apart and then built up the grey white colour of the cobwebs and that was it really.  I really enjoyed the process and I am happy with how it came out altogether.


Let me know what you think and tell me on Facebook or here what you are doing to celebrate Halloween.

Hugs

Celina


Monday, 11 August 2014

Scraps of Elegance July Inspiration Board Challenge


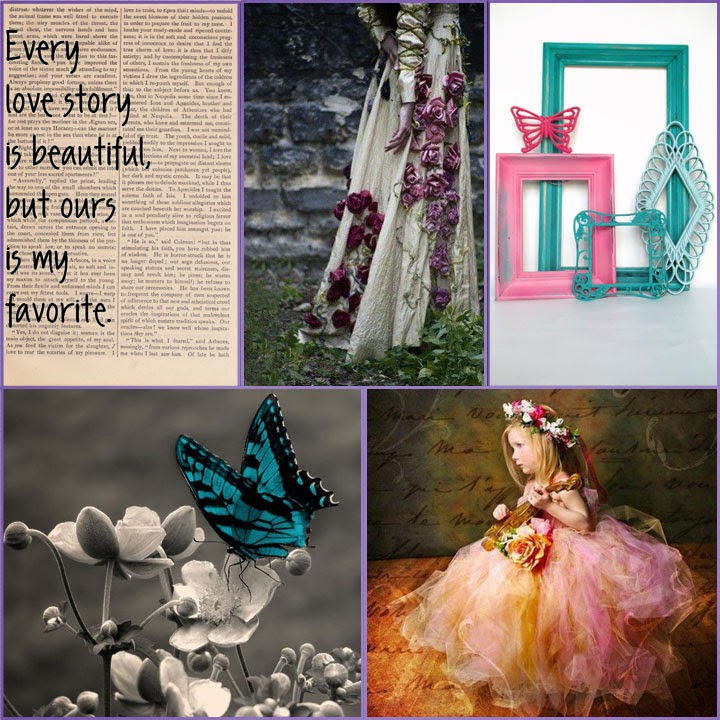
For July Melinda decided that an inspiration board would be the challenge for this month rather than the usual sketch for Scraps of Elegance


You can find the kit listed here and a description of all the products used.


Other Supplies Used

Elizabeth Craft Designs Silk Glitter
PaperArtsy Grunge Paste
Golden Extra Heavy Gel Medium (matte)
Tim Holtz Dies Ornate Frames, Courtyard, Lattice
Tim Holtz Distress Ink Walnut Stain
Tim Holtz Stars
Inkssentials Crackle Accents
Inkssentials Glossy Accents
Cosmic Shimmer Hologram glitter
PaperArtsy 9" x 11" stencil
Prima Butterfly Stencil
Prima Resin Frames
Fabscraps Die cut shape (Forever and Always)
Lindy Stamp Gang Hydrangea Blue Mauve embossing powder

I used the IB panel 3 had different frames and I cut out 2 from the Sizzix Ornate frames and applied glossy accents.  I accented those with a Prima rsin heart frame and embossed it with LSG desert moon turquoise


The first IB panel is focussed on the phrase so I used this one from Fabscraps and embosses LSG embossing powder in 2 layers to build it up and give it a great shine
The butterfly on IB panel 4 is shown in a few ways. I used the Prima Butterfly stencil with Golden extra heavy paste and put fuchsia silks glitter on most of them and Cosmic Shimmer Iced Snow on the rest.  I used the same colour on the board and put it in the glitter on the grunge paste on the circles.  I used the dark gray from the IB as my scrapbook page.  I used the reneabouquet butterfly as an accent.
On the last IB panel the little girl is wearing a crown of pink flowers which I put on the bottom right.  I also thought it looks aged so I used the clock charm to accent it.  I used the Prima Chalk pink through a paperartsy stencil.  I used the courtyard die to cut out all circles (like a crown)
I really hope Melinda keeps the IB panel because it works so much better than a sketch and most of us show much more than a sketch piece on the forum/community.

Tell me what you think

Hugs


Friday, 6 June 2014

Tim Holtz 12 Tags of 2014- A Technique That's So Much Fun for the Month Of June!!!

This is the technique that Tim Holtz posted for his 12 Tags of 2014 for June.

Normally because of the inclement weather I usually have to edit the dull look of the pictures.  Not This Time!!!  Yesterday the sun shone (I know it seems weird for Ireland), so all I needed to do was crop the photos. That means what you see here, is how vibrant and summery it truly looks!! I kid you not LOL :) 

I loved his tutorial so much that I've made 4 no 5 more tags of yummie-ness now!!!

To do this technique click on the 12 Tags link I've made above and it will go to Tim's blog where you can emulate him and post your own fab creations because it will give you fantastic results!!

It's essentially a watercolor letterpress technique and so simple that it's GENIUS!! 


Supplies

Wood-mounted Tim Holtz Change stamp
Tim Holtz - Stampers Anonymous Papillon
Tim Holtz - Distress Ink Pads - Mini Kit One (Picked Raspberry, Mustard Seed, Peacock Feathers & Spiced Marmalade)
Tim Holtz - Layering Stencils - Rays
My Stash Buttons, Metal flower
Junkyard Findings
Prima Resin Butterfly
Smooth Watercolour Cardstock
Kitchen Towels (to soak up excess liquid)
Scraps of Elegance Scrapbook Kit Club Clear drops & Hat Pins
Prima Large Clear Pebble
Foam Pads
American Seam Binding Ribbon White
Watermister
Beacon Quickgrip Clear Glue
We R Memory Keepers Corner Chomper Green Deco/Stub 
Tim Holtz Watercolor Fine Detail Waterbrush
Ranger Heat Tool
Ranger Black Archival Ink Pad
3/16 WRMK Big Bite Punch and lilac eyelet


When I did this technique, it didn't take long at all.  The most important step, is to thoroughly dry, the watercolor card, with a heat tool.

As the distress ink pads have to be applied to the reverse side of the stencil directly, it works best with the mini ink pads as more color can be applied to it and then spritzed with water and applied to the cardstock.  I have used the larger ink pads to bigger stencils with good effect.

I love vibrant colors like those in 'Mini Kit One', which naturally, was the first set I bought and the results were wonderful I think.


I used the Papillion Stampers Anonymous Butterfly Stamp, but because I didn't have the one that can be used with the Framelit Dies, I had to fussy cut them individually after I'd watercoloured them as per Tim's instructions.

The butterflies had been stamped onto the smooth watercolour card itself and the cut out ones mounted on double-sided foam pads to give it plenty of dimension.


I stamped the Change sentiment as well as all the other stamping with Black Archival Ink and heat set it so the watercolouring wouldn't bleed the stamped images

I thought that because have to go through a metamorphosis and emerge anew. 


I had lots of fun searching through my terrifying stash (some say trash.  I say whatever!!) to add the finishing touches to my tag after the corners had been chomped off by my WRMK Green CC on the Deco side.

I am not sure what the metal pieces came from (at least 1 is a Junkyard Finding or Finnabair cog maybe) and then I used the Large Clear Pebble from Prima.

The smaller pebbles are part of the Scraps of Elegance Kit for this month (more to follow with that kit Woo Hoo!!

Then the hat pins actually came from the Scraps of Elegance Flutter April Kit from which I snipped the off the sharp needle-points 
To finish I pressed all the mini distress ink pads that I used and spritzed generously with water and then dragged a long ribbon through it and then dried with my heat tool (Ranger of course LOL!)

Be sure to check out Mr Holtz blog (follow the link at the top of this post) and try out this technique for yourself with all the stencils and inkpads and glorious funness you have to play with and see how something so simple is so wonderful and creates amazing results.

Tell me what you think as I love reading comments.  It means I'm getting better at what I'm doing.

Hugs for Everyone,

Celina

Thursday, 15 May 2014

Scraps of Darkness Radioactive Kit

I know that it has been quite a while since I posted any of my projects because as the saying goes 'life is what happens when you're busy making plans'.


On saying that I have been making lots of things that I have really loved making all because of the fantastic Martina Downes and her coming across Kathy Orta of Paper Phenomenon fame!!!  My creative side of life thanks Martina for letting me know about her however not my wallet!!  I swear I can hear my Paypal account crying along side my hubbie :)


Now as I bought a few tutorials initially, I love the way she writes them and I bought the class video annual subscription to get a feel of how she thinks and works.  The woman is amazing!!  I love how she makes the most detailed and seemingly impossible creations and then breaks it down to little building blocks so anyone can do it.


She has a really infectious laugh and the way she interacts with everyone is funny and she makes it feel like everyone is her best friend.

I've been making up a storm and loving every minute.


Now I made this from the from the Scraps of Darkness Apri Kit of which I always get at least the Main Kit and the Embellishment Add-on.  I love the kits Melinda makes up every month and I also started with her Scraps of Elegance Kits and Add-ons as well as she is inspired in her choices.


But I have to say hands down that this has been the most amazing kit that I have EVER seen in my crafty live ever!!! I love, love, loved everything and once I found out what collections the papers came from I bought 2 of every paper collection.  That is they were American Crafts Amy Tangerine Plus One, LemonLush from Studio Calico, Bo Bunny my Li'l Monster and Printshop from Studio Calico.


I decided to start off with something easy and even though I can't tell you how it's done, I did do my own thing in regards to size of the pages which were 5.5' x 7 and could hold over 100 photos or mats.


I made it for my niece and she was blown away!!


Well I hope you like it and love how fresh and vibrant the papers are.  I'm already working on a new project with these fabulous papers.

Let me know what you think!!

((Hugs))

Celina

Kathy Orta Paper Phenomenon Tutorial
I used American Crafts White Cardstock, Amy Tangerine Plus One Paper Collection
Studio Calico Lemon Lush and Printshop Paper
Bo Bunny Li'l Monsters Paper
Tim Holtz Idea'ology Documented Alpha Parts Framed, Distress Inks, Picked Rasberry, Peacock Feathers, Green Meadow, Squeezed Lemonade, Marmalade.
American Crafts Plus One Collection Paper, Washi Tape, ribbon, magnetic binder clips, thickers phrase, flair buttons.
Prima Flowers, Bloom Chipboard Pieces, Stamp
Silver Chain from my stash to make oramental closer with the binder clips
Martha Stewart Punches
Radioactive Add -on colours
  • Shimmerz - Dazzlerz Paint - Dreamscicle
  • Shimmerz - Dazzlerz Paint - Grape-tastic
  • Shimmerz - Dazzlerz Paint - Lemon Drop
  • Shimmerz - Dazzlerz Paint - Sour Apple


Wednesday, 5 February 2014

All Hail Moldable Film and Fibre

 Angelina Fusible film and fibre and Fantasy Molding Film and Fibre is something that I have had in my arty crafty arsenal for a long long time and I bought it a couple of years ago initially and had great fun with it for a while and then when I had used it all up, I kept meaning to buy more and when life got in the way as it does, I kept forgetting until I forgot all about it completely LOL!!


Blue Fire Fantasy Film with Lindy's Stamp Gang Venus Violet Blue Embossing powder 
Tim Holtz Stampers Anonymous Cling Stamp


Then a stange thing happened.

I was clicking my way around youtube as I often do (I have the attention span of a fruitfly when I'm bored) and I clicked on a video that I had seen before and it was about one of the ways you can use Angelina/Fantasy Film or Fibre.  She made really cool pendants using embossing powder, UTEE, glass and fantasy film.


You can stamp it, sew it, even wash it.  It only bonds to itself and fibre and you can keep the excess and bond it to more of itself and there is no waste at all.
abc
a. b. and c. are all done with the same film and embossing powder and PaperArtsy Hot Picks Mini Stamp but they all look different because of the ink pad or stamp paint
(a) is with Brilliance Silver Pigment ink (b) is actually Viva Decor Stamp Paint (Post on this fun line to follow and (c) is with Brilliance Platinum ink pad

So these are a few of the ones that I have made using different colours and Stamps and Different inks I used.
Up Close

 2x2 inch glass PaperArtsy Hot Pick stamps

I found my old stash of film and even fibre (after ripping my art room apart looking for it) and played, and played and played!!!!  It was so much fun and I really enjoyed the process and wanted to make many more eclectic pieces until well ... I used it all up :( .  So what I did then, is what I normally do.  I went online and bought some Angelina film and fibre from Claritystamps.co.uk and found out where I could get the same kind of Fantasy film and found it with the ArtGlitter.com and they had so many more colours and I bought 1 of every colour and it even comes in 20 inch wide in the Aurora for wearable art.  So cool!!!  It was super fast on the delivery as well from both web sites.


This is 1.5x1.5 glass and frame and I used I think a Hero Arts cling stamp and clear embossing ink pad. I love the subtle effect the clear ink gives this piece


Supplies
1. Fantasy Film
2. Clear UTEE
3. Embossing Powder (dark colours are best)
4. Ranger Memory Glass (2x2 1x3 1.5x1.5)
5. Memory Frames (not essential)
6. Versamark or any clear embossing ink pad
7. Stamp that is bold and not too detailed

Now to make;

1. press glass slide into ink pad and make sure it is completely coated and pour dark embossing powder and return excess to jar and melt with heat tool repeat this at least 3 times.
2. cut a piece of film approx 2x the size of the glass and scrunch it up as much is possible and leave to one side
3. once the powder is dry on the glass and cool to the touch press the embossed side of the glass into the inkpad and un-scrunch the film and press into the embossing powder
4. heat with the heat tool and it will shrivel the film but don't be afraid and let it cool down again
5. once the film is cool to the touch press the ink pad into the film and pour UTEE onto it and pour the excess into the jar and repeat step 1 two more times.
6. ink up the stamp with any sort of permanent archival ink that you want to use.  I used Brilliance Silver that takes a good while to dry because the Staz-on just wouldn't do what it was told to do and press very firmly into the UTEE whilst it is still hot.
7. once it has cooled down angle your scissors slightly and cut off the excess around the glass and slide into a memory frame.  

It's so fun and I gave them to a few of my aunts and they seemed to like them.

I'm putting the film on everything and anything and it looks fantastic!  Really does live up to its name.

That's all for today.  Let me know if you like what I made using just one truly fun technique.

I hope you are all well where you are and take care of yourselves.

((Hugs))
1x3 This has a little fibre under the film and gives more depth

They make great key chains & its portable art
I love that the stamps look a little celestial

 
Celin