Showing posts with label Challenge. Show all posts

Thursday, 29 January 2015

Same Three Things, Three Ways in Three Days No1(a)


As promised I am going to explain something I've decided to call (for now) Same Thing, Three days, Three ways.

It's really quite simple.  Once a month I am going to make 3 projects using 3 same items and demonstrate their versatility. For this month I am showcasing:

Simon Says Stamp/Memory Box Large Ringlets Die
Memeory Box Delightful Peony Background and Outline Die (I'm counting this 1 item)
Chocolate Baroque Stamp Punky Romance

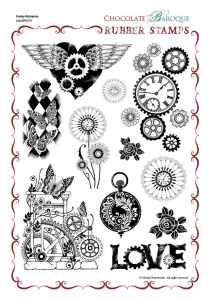
Memory Box LARGE RINGLETS Craft DIE 98790 Punky Romance Rubber stamp sheet - A4
Memory Box DELIGHTFUL PEONY OUTLINE Craft DIE 98742Memory Box DELIGHTFUL PEONY BACKGROUND Craft DIE 98744


Other Supplies
Kraft-tex
Blue Fern Studios Chipboard
Reneabouquet Butterfly
LSG Jan Challenge Colours
Sequins
Paper Artsy Stamp If I had Wings
Royal Purple Staz-on Ink
Couture Creations World Fair Collection Embossing Folder - Work Shop
Tim Holtz Tag and Bookplate Bigz Die
Clear Embossing Inkpad

Embossing PowderSpray
Pop Rock PurplePop Rock Purple
Midnight RubyJazzy jivin' Purple
Angel Wings MauveTea Pot Pruple
Terra cotta PlumCape Cod Coral
Magic Moon Pearls
Don't Eat Yellow Snow  

Tutorial

Using the Bigz die, cut a size 8 tag out of Kraftex
Using Clear Embossing inkpad stamp the Chocolate Baroque Stamp from Punky Romance and heat Emboss it with Angel Wings Mauve
This created a resist and then spray with Cape Cod Coral and Don't Eat Yellow Snow and dry using heat tool
I cut out 4 Ringlets dies from Kraftex and sprayed it in the Jazzy Jivin Purple, Cape Cod Coral, Tea Pot Purple, Pop Rock Purple and adhered the outline to the tag, then put the other coloured inside pieces and glued them down
I cut out the Peony Background die and then did another resist with the Stamp and Angel Wings Mauve
Once dry I sprayed lightly with Jazzy Jivin Purple and cut the matching Outline Die in Kraftex again and sprayed it with Don't Eat Yellow Snow (Gross yet fun name LOL!) to give it a subtle shimmer
glue them together and then fixed it to the tag
I embossed the chipboard with the Terra Cotta Plum embossing powder and stamped the If I had Wings on Kraftex and inked the edges with Dusty Concord Distress Ink and fixed it to the tag and put 3 hat pins in the foam itself
I wrapped bakers twine 3 times around the tag and out brown sequins all over the tag.  I put a Reneabouquet Signature Butterfly to the Flower Head
I used the bakers twine and ribbon on the top of the tag to finish

I'll be putting this up on the Lindy's Stamp Gang January Callenge
I'll put the next post up tomorrow.

Monday, 11 August 2014

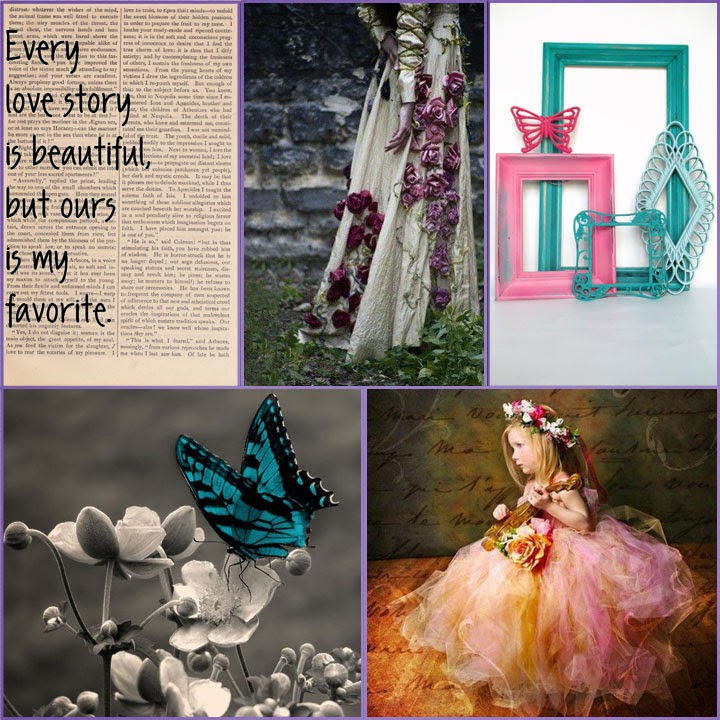
Scraps of Elegance July Inspiration Board Challenge


For July Melinda decided that an inspiration board would be the challenge for this month rather than the usual sketch for Scraps of Elegance


You can find the kit listed here and a description of all the products used.


Other Supplies Used

Elizabeth Craft Designs Silk Glitter
PaperArtsy Grunge Paste
Golden Extra Heavy Gel Medium (matte)
Tim Holtz Dies Ornate Frames, Courtyard, Lattice
Tim Holtz Distress Ink Walnut Stain
Tim Holtz Stars
Inkssentials Crackle Accents
Inkssentials Glossy Accents
Cosmic Shimmer Hologram glitter
PaperArtsy 9" x 11" stencil
Prima Butterfly Stencil
Prima Resin Frames
Fabscraps Die cut shape (Forever and Always)
Lindy Stamp Gang Hydrangea Blue Mauve embossing powder

I used the IB panel 3 had different frames and I cut out 2 from the Sizzix Ornate frames and applied glossy accents.  I accented those with a Prima rsin heart frame and embossed it with LSG desert moon turquoise


The first IB panel is focussed on the phrase so I used this one from Fabscraps and embosses LSG embossing powder in 2 layers to build it up and give it a great shine
The butterfly on IB panel 4 is shown in a few ways. I used the Prima Butterfly stencil with Golden extra heavy paste and put fuchsia silks glitter on most of them and Cosmic Shimmer Iced Snow on the rest.  I used the same colour on the board and put it in the glitter on the grunge paste on the circles.  I used the dark gray from the IB as my scrapbook page.  I used the reneabouquet butterfly as an accent.
On the last IB panel the little girl is wearing a crown of pink flowers which I put on the bottom right.  I also thought it looks aged so I used the clock charm to accent it.  I used the Prima Chalk pink through a paperartsy stencil.  I used the courtyard die to cut out all circles (like a crown)
I really hope Melinda keeps the IB panel because it works so much better than a sketch and most of us show much more than a sketch piece on the forum/community.

Tell me what you think

Hugs


Sunday, 25 May 2014

SOD Stationers Desk Large Tag May 2014 Facebook Challenge

I saw a post on Facebook about making something using a dressform (Tim Holtz die I believe) and if you didn't have the right die anything would be really ok as an alternative.

I'd made this tag which actually started off as a bookmark, magetized and everything, then it morphed into something else as these things always end up doing (everyone can relate right? :) )


  • 5 double sided papers from Prima's Stationer's Desk Collection
  • 5 double sided papers from Prima's Cartographer Collection
  • Prima: Stationer's Desk Collection - Pencil Flowers
  • Prims :Everyday Vintage Paintables 
  • Prima: Cartographer - Type Keys Clips
  • Prima: Ingvild Bolme - Mannequins
  • Ranger: Liquid Pearls - Copper
  • 1 Floral Bronze Metal Embellishment
  • Martha Stewart Circle Edge Punch Cartridge - Flower Arches (my stash)
  • DIY 3 x 4 Chalkboard Sheet (my stash)
  • Prima Stationers Desk - Tag Me - Ticket and Tag Set
  • Small Office Hinge Clip (my stash)
  • Tim Holtz Distress inks  Weathered Wood, Red Brick, Frayed Burlap, Old Paper (my stash)
  • Creative Impressions - Antique Ruler Twill Ribbon   


As you can all see, Melinda really delivered on a kit (I've said this a few times already I know!! LOL) that is so versatile.

I already had this made so I knew I would be able to post it in by the deadline.  I not sure if I like how it turned out.  I used everything except the chalkboard which, can be swapped for something else as the brass flower is actually adhered to an office hinge clip that I had in my stash.

I started off using a size #10 tag I believe and used the Stationer's Desk Red Romance and cut the paper down to size and distressed it by wetting it slightly and crumpling it up over and over and then ripped into the edges and opened it out and glued it to the tag.  Then I inked the edges with the Tim Holtz Distress ink (LOVE LOVE LOVE his genius!!!!) and put the twill ribbon under the cardstock and then inked that with some frayed burlap ink to age it too.

I put the wonderful big flowers bottom left and upper right that came in the kit and only stuck the bottom half and upper right of the flowers to the paper so the Paintables which I coloured with my distress markers Red Brick and Pine Needles a little.  Then I put the coloured image between the flowers and then used the Type Keys Clips and Stationers Desk Tags and Tickets and placed them around the paintables. Then I used the Martha Stewart French Scroll Punch with some of the Red Ink cardstock and applied it between the tag and red cardstock.  Used some Weathered Wood Ink to the edges of the punched out cardstock.  I put the mannequin piece from the kit on the top left and then thought it only looked ok.  Certainly not the best thing I've ever done and left it alone to wait for inspiration.

Later I realised that I needed to make another layer and see what would happen (I'm not a tag making sort of person.  It's a real crap-shoot how it turns out! (& no I've never played craps but I have seen Guys and Dolls loads of times and like the song 'Luck be a Lady Tonight') I love that movie!! :)

I used the Cartographer Faire un Voyage and used the Martha Stewart Flower Arches Cartridge and cut an 8" circle and then inked the edges with Frayed Burlap and Folded half to the front and glued the back.  I put tiny little dots of the Perfect Pearls Copper strategically as accents and then using the packaging from the Tickets and Tags and Used the WRMK Deco corner chomper punch side and then inked the edges and stuck on to the front of the circle.

Then I got the the Brass Flower and glued it to a small Hinge clip and Glued it to the top of the Deco cut piece and finally I got to finish it up using another piece of the resin corset and put that on the lower left and used some more of the tags and type keys to complete it.  After it was all done I used white chalk and scribbled it over the 3x4 chalkboard and then wrote Dress up time!!!  Fun Fun Fun

Hugs for Everyone

Celina