Showing posts with label Lindy's Stamp Gang Challenge. Show all posts

Thursday, 29 January 2015

Same Three Things, Three Ways in Three Days No1(a)


As promised I am going to explain something I've decided to call (for now) Same Thing, Three days, Three ways.

It's really quite simple.  Once a month I am going to make 3 projects using 3 same items and demonstrate their versatility. For this month I am showcasing:

Simon Says Stamp/Memory Box Large Ringlets Die
Memeory Box Delightful Peony Background and Outline Die (I'm counting this 1 item)
Chocolate Baroque Stamp Punky Romance

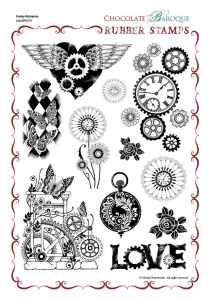
Memory Box LARGE RINGLETS Craft DIE 98790 Punky Romance Rubber stamp sheet - A4
Memory Box DELIGHTFUL PEONY OUTLINE Craft DIE 98742Memory Box DELIGHTFUL PEONY BACKGROUND Craft DIE 98744


Other Supplies
Kraft-tex
Blue Fern Studios Chipboard
Reneabouquet Butterfly
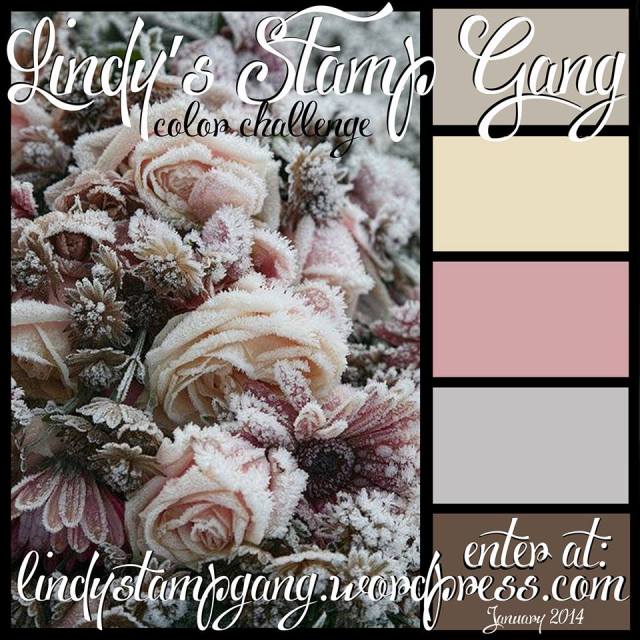
LSG Jan Challenge Colours
Sequins
Paper Artsy Stamp If I had Wings
Royal Purple Staz-on Ink
Couture Creations World Fair Collection Embossing Folder - Work Shop
Tim Holtz Tag and Bookplate Bigz Die
Clear Embossing Inkpad

Embossing PowderSpray
Pop Rock PurplePop Rock Purple
Midnight RubyJazzy jivin' Purple
Angel Wings MauveTea Pot Pruple
Terra cotta PlumCape Cod Coral
Magic Moon Pearls
Don't Eat Yellow Snow  

Tutorial

Using the Bigz die, cut a size 8 tag out of Kraftex
Using Clear Embossing inkpad stamp the Chocolate Baroque Stamp from Punky Romance and heat Emboss it with Angel Wings Mauve
This created a resist and then spray with Cape Cod Coral and Don't Eat Yellow Snow and dry using heat tool
I cut out 4 Ringlets dies from Kraftex and sprayed it in the Jazzy Jivin Purple, Cape Cod Coral, Tea Pot Purple, Pop Rock Purple and adhered the outline to the tag, then put the other coloured inside pieces and glued them down
I cut out the Peony Background die and then did another resist with the Stamp and Angel Wings Mauve
Once dry I sprayed lightly with Jazzy Jivin Purple and cut the matching Outline Die in Kraftex again and sprayed it with Don't Eat Yellow Snow (Gross yet fun name LOL!) to give it a subtle shimmer
glue them together and then fixed it to the tag
I embossed the chipboard with the Terra Cotta Plum embossing powder and stamped the If I had Wings on Kraftex and inked the edges with Dusty Concord Distress Ink and fixed it to the tag and put 3 hat pins in the foam itself
I wrapped bakers twine 3 times around the tag and out brown sequins all over the tag.  I put a Reneabouquet Signature Butterfly to the Flower Head
I used the bakers twine and ribbon on the top of the tag to finish

I'll be putting this up on the Lindy's Stamp Gang January Callenge
I'll put the next post up tomorrow.

Sunday, 7 September 2014

Lindy's Stamp Gang September Challenge and Scraps of Darkness Scraps of Elegance Inspiration Board


Embossing Powder - Spray
Hyacinth Blue Green - Danny Zuko's Denim
Silver Moon Mistletoe - Gag Me With A Spoon Gray
Desert Moon Cooper Teal - Fuzzy Navel Peach
Madonna Robe Blue - Ocean Breeze Blue

Cleopatra's Copper - Cowabunga Copper


Other Supplies:
Chocolate Baroque Mackintosh Beauty Stamp
Chocolate Baroque Mackintosh Sentiments Unmounted Clear Cling Stamps
Sue Wilson Dies Finishing Touches Collection - Classic Roses
Sue Wilson Cascading Hearts A4 Embossing Folder
Spellbinders Decorative Labels 28
Creative Expressions Pearly Head Pins
Viva Decor Pearl Pen - Copper
Prima Finnabair 12x12 Butterfly Stencil
Centura Pearl A4 Cardstock in White Gold, Chocolate Brown and Navy.
Copic Marker Pinkish White
Tim Holtz Distress Ink Pad Wild Honey
Tim Holtz Trellis Framework Die
Tim Holtz Mirrored Sheets

How I Did This

It's a little hard to see but on the shimmery side of the Centura Pearl Snow White Cardstock I cut it down to 71/2" x 71/2" and put the Prima Elementals Finnabair Stencil Butterfly on top and sprayed with the LSG Ocean Breeze Blue and let it sit and remvove the stencil and dried it thoroughly with my heat tool.
When completely dry I sprayed the whole thing with the Same Spray lightly and then dried it again thouroughly.  I loved how it looked and I stamped the Chocolate Baroque Mackintosh Sentiments Stamp 'Happy Birthday' on the lower Left Side and then embossed it with the Sue Wilson Cascading Hearts Embossing folder and then put it to the side.

On another Centura Snow White Cardstock and I Stamped the Chocolate Baroque Mackintosh Beauty on the reverse of the cardstock which is fantastic for colouring and painting and inking!  I embossed the image with the fabulous Silver Moon Mistletoe and when cool I started the fun fun stuff!!


I have all the sprays and powders but not the magicals and I really wanted to color in the image so I gave it a little go.  I colored the skin areas with Copic Marker 'Pinkish White'

I opened all the bottles and dipped my fine paintbrush into the bottle itself.

I used the Gag Me With A Spoon Grey for her hair.  I painted all the flowers with the Ocean Breeze Blue.  I did the ribbon in Fuzzy Naval Peach.  I did the dress in the Cowabunga Copper and Fuzzy Naval Peach to accent here and there and the Danny Zuko Denim for the sleeve.

I let it dry naturally before I cut it out with the largest die from the Spellbinders Decorative Labels 28 and then used the TimHoltz Wild Honey Distress Ink Pad around the edge.
 To do the flowers and leaves I cut the White Centura Pearl Card into 3 strips and sprayed 1 with the Gag Me With A Spoon Gray, and Fuzzy Naval Peach dried them well and cut out 2 flower outline 2 of the detailed flower and 2 large/extra large and 2 small leaves and applied as seen the peach with the gray detailed flower pinched the petals for dimension and then put the bottom part in reverse and glued them in place.  I put the leaves where I wanted and then put it all to the left of the stamped image.


For the band that goes across and under the die cut spellbinders piece I cut out 3 Frameworks Trellis from Tim Holtz. 2 in plain cardstock and one in the Tim Holtz Mirror sheet.  Sometimes it's neccessary to put the mirror sheet through your Big Shot (just remember to change the piece you want cut around a little so it will cut more) because the sheets are quite thick.  On the 2 I cut from cardstock I inked them up with clear embossing and poured the Hyacinth Blue Jade Embossing Powder over it and heat embossed (I did this twice to ensue a thick and complete impression)

Then with the little pieces I applied glue and covered some with Gag Me With A Spoon Gray Glitter and others with the Cowabunga CopperGlitter  (which are both from the Totally 80's set) and 1 with the magicals powder itself of the Cowabunga Copper (it was an accident but I loved the look of that piece). I also used a some of the mirror sheet pieces.

Once I was happy with where I wanted to place the focal point raised up slightly with double sided foam adhesive pads on the embossed cardstock I glued the Trellis piece and then put everything together.  I layered it all and rounded the corners with the We R Memory Keepers Corner Chomper Deco/Stub and I used the Viva Decor Pearl Pen to create dots all around the edge (it was the 1st time I did this and they are by no means perfect I'm afraid!).


To Finish I layered the piece to Brown and then Navy Centura Pearl cardstock.

Let me know what you think of this.

Hugs for everyone!


Thursday, 15 May 2014

Scraps of Darkness Radioactive Kit

I know that it has been quite a while since I posted any of my projects because as the saying goes 'life is what happens when you're busy making plans'.


On saying that I have been making lots of things that I have really loved making all because of the fantastic Martina Downes and her coming across Kathy Orta of Paper Phenomenon fame!!!  My creative side of life thanks Martina for letting me know about her however not my wallet!!  I swear I can hear my Paypal account crying along side my hubbie :)


Now as I bought a few tutorials initially, I love the way she writes them and I bought the class video annual subscription to get a feel of how she thinks and works.  The woman is amazing!!  I love how she makes the most detailed and seemingly impossible creations and then breaks it down to little building blocks so anyone can do it.


She has a really infectious laugh and the way she interacts with everyone is funny and she makes it feel like everyone is her best friend.

I've been making up a storm and loving every minute.


Now I made this from the from the Scraps of Darkness Apri Kit of which I always get at least the Main Kit and the Embellishment Add-on.  I love the kits Melinda makes up every month and I also started with her Scraps of Elegance Kits and Add-ons as well as she is inspired in her choices.


But I have to say hands down that this has been the most amazing kit that I have EVER seen in my crafty live ever!!! I love, love, loved everything and once I found out what collections the papers came from I bought 2 of every paper collection.  That is they were American Crafts Amy Tangerine Plus One, LemonLush from Studio Calico, Bo Bunny my Li'l Monster and Printshop from Studio Calico.


I decided to start off with something easy and even though I can't tell you how it's done, I did do my own thing in regards to size of the pages which were 5.5' x 7 and could hold over 100 photos or mats.


I made it for my niece and she was blown away!!


Well I hope you like it and love how fresh and vibrant the papers are.  I'm already working on a new project with these fabulous papers.

Let me know what you think!!

((Hugs))

Celina

Kathy Orta Paper Phenomenon Tutorial
I used American Crafts White Cardstock, Amy Tangerine Plus One Paper Collection
Studio Calico Lemon Lush and Printshop Paper
Bo Bunny Li'l Monsters Paper
Tim Holtz Idea'ology Documented Alpha Parts Framed, Distress Inks, Picked Rasberry, Peacock Feathers, Green Meadow, Squeezed Lemonade, Marmalade.
American Crafts Plus One Collection Paper, Washi Tape, ribbon, magnetic binder clips, thickers phrase, flair buttons.
Prima Flowers, Bloom Chipboard Pieces, Stamp
Silver Chain from my stash to make oramental closer with the binder clips
Martha Stewart Punches
Radioactive Add -on colours
  • Shimmerz - Dazzlerz Paint - Dreamscicle
  • Shimmerz - Dazzlerz Paint - Grape-tastic
  • Shimmerz - Dazzlerz Paint - Lemon Drop
  • Shimmerz - Dazzlerz Paint - Sour Apple


Thursday, 6 February 2014

Lindy's Stamp Gang February Color Challenge


1888689_10203190679996746_1901479501_n

Embossing Powder - Starburst Spray

Starbright Gold Green - Opal Sea Oats

Midnight Teal - Tibetan Poppy Teal

Razzleberry Plum - Cheshire Cat Cherry

Silver Moon Turquoise - Silent Night Silver
I think I seem to have craft dies from most company's and so many that I haven't even begun to use a fraction of them in my cards, alterables or scrapbook pages.  I started out collecting Spellbinders ones first, then Memory box, Simon Says Stamps and Sizzix.  I freely admit I have gone way overboard on more than one occasion.

So I decided to really challenge myself and try to make a nice card without using my dies and use chipboard pieces so I didn't cheat ... well ... me!!

At the moment the whole less is more trend is something I'm struggling with.  It's difficult to keep the bulk of a card white or neutral so I did this card as a study of sorts to find out how difficult it is to do a minimalistic looking and make it aesthetically pleasing too.  I like how it turned out considering how it was made up of a 3inch strip of lots of dots pretty much.

My passionate love affair with the fabulous LSG starburst sprays is ongoing, because they are two-toned (three tones really) sprays.  Not only do they have the main colour i.e. Cherry but also a mica that is golden and an extra more subtle shimmer too.

Their embossing powders have fantastic coverage and are two toned.  I love them and they are my go to embossing powder.  There isn't a colour I don't love.

Supplies

Centura Pearl Card (non-pearl side)
Lindy's Stamp Gang Starburst Spray Tibetan Poppy Teal
Lindy's Stamp Gang Starburst Spray  Cheshire Cat Cherry
Lindy's Stamp Gang Starburst Spray Silent Night Silver
Lindy's Stamp Gang Starburst Spray Don't Eat Yellow Snow

Lindy Stamp Gang Embossing Powder Angel Wings Mauve
Lindy Stamp Gang Embossing Powder Razzleberry Plum
Lindy Stamp Gang Embossing Powder Silver Moon Turquoise

Lindy Stamp Gang Glitter Gag Me With A Grey Spoon
Lindy Stamp Gang Glitter Pretty in Pink

Cosmic Shimmer Black Detail Powder
Just Rite Everyday Vintage Stamp

Versamark Frost Ink Pad
ArtGlitter Dries Clear Glue
Brilliance Pearlescent Yellow Ink Pad
Wycinaka Chipboard Hummingbird Swirls

1. Cut and trim centura pearl card to 20cmx20cm and leave to the side
2. Cut 3inch width x 20cm length and using the starburst sprays unscrew the cap and flick drops onto the 3" strip of card on the reverse side of the card and dry
3. Repeat with the Cheshire Cat Cherry and dry and then the Silent Night Silver
4. With the Don't Eat Golden Snow Spray spritz the whole piece with the spray and then dry
Hello Friend Says It All, Dont You Think?
5. With the chipboard pieces Ink it with the Versamark and pour on the embossing powder (larger piece is Razzleberry Plum and the smaller piece with the Silver Moon Turquoise) It took 2 layers to get the right amount of powder on them.
6. While the pieces cool I took the little chipboard flowers and put a layer of glue on each of them and then applied half of them in Gag me With a Grey Spoon Glitter and the rest with Pretty in Pink Glitter
7. Ink up Hello Friend phrase and stamp directly to the lower right of the 20x20cm piece of card
8. Edge the 3inch strip with brilliance pearlescent inkpad and adhere it onto the middle of the 20x20inch card
9. Glue the large Razzleberry embossed Chipboard to the middle of the coloured strip and place the little glittered flowers
10. The smaller swirl is glued under the phrase and the remaining glittered flowers affixed to the rest of the card.
11. Layer the card onto holographic mirror card to finish


Try making a card like this and don't be afraid of empty spaces.

((Hugs))

Celina


Tuesday, 14 January 2014

Lindy's Stamp Gang January Colour Challenge

This is my entry for the January colour challenge.  
I thought it looked drab and for a few days I was not going to do an entry.  That is until I remembered the Once Upon a Time series specifically the Season 2 premiere where Aurora wakes up from her sleep.  I knew that my niece would love this theme and so I became inspired.  She is fifteen since the 9th and although I had given her money I decided to make her something as well.

I bought a wood hanger from CardznScrapz. Then I ran away with it!!

Viva Decor Graphite Ferro Paste  (a fantastic gritty structure) that dries quickly and can be painted and sanded and easy to use.

I painted it with white paint and dried it with a heat tool.
Then I got to work and as my three year old says "Oh! What Fun!!".
The fabulous products I used from Lindy's Stamp Gang are
Bodacious Blush spray and magicals
Gag Me with a Spoon Gray spray and magicals
Cleopatra's Copper embossing powder
Silver Moon Mistletoe embossing powder
Queen Sheba Silver embossing powder
Gag Me With a Spoon Gray and Bodacious Blush Glitter
Fusible Webbing which is really fun to play with.
Lindy's Stamp Gang Side Swirl Accents Large and Small (I love these as they are simple and aesthetically pleasing on any project.)
Prima Flowers and Resin Fairy
Versa Mark Frost Embossing Pad
Prima Brads
Prima Junkyard 

Memory Box Alphabet Dies Uppercase and Lowercase  

Golden Acrylic Paints for a base.

I painted the entire hanger white once the Ferro had dried. 

I painted it alternating between Burnt Sienna and Alizarian Crimson Hue and Gray made up of Carbon Black and Titanium White.
I painted up a lot of layers of Magical Gag Me with a Gray Spoon and Bodacious Blush which I had barely dipped with water. 

I layered the colours so many times that the colours became opaque.  Then to blend the edges I sprayed more of the colours all over. When it dried I put the webbing in a few areas and used the heat gun to make it look lacy (slightly) and put a little Cleopatra's Copper and Queen Sheba Silver and heat embossed it.
I put the glitter on the LSG accents and let them dry.


I sprayed and painted the Prima Flowers with the LSG sprays.
I layered them with the Junkyard Findings and brads and dried everything.


With the fairy I applied the Versamark pen and used the Cleopatra Copper for the dress. I embossed the wings with a tiny amount of the Cleopatra Copper and Silver Mistletoe.
I die cut the uppercase and lowercase letters and embossed with Silver Mistletoe and adhered everything to the hanger.
I think my Niece will like it.
I hope you tell me what you think, I would love some feedback.
That's all for now
((Hugs))
Celina